Showing posts with label maya. Show all posts

Monday, August 19, 2013

50% Grey Midpoint in Maya Diplacement

Maya displacement is something that I avoid using as much as possible.

I've always maintained that my reluctance is because I don't have much experience with sculpting (Though I've used Mudbox a little bit), and that no matter how I do it, greyscale displacement maps never look as nice as a normal map.

That being said, I've discovered that greyscale normal maps don't import into Maya correctly (to my view).

Logically, I would expect a value of 50% grey to not change the displacement of an object at all, while white would be the equivalent of 100% displaced up, and black 100% displaced down.

Maya by default takes black as no displacement and white as 100% displaced up.

In order to fix this, you need to put the following formula into the Alpha Offset slot of the file node which holds the displacement image:
=-0.5*%FILE%.alphaGain
Where %FILE% is the name of the file node (or texture node if you're not using a file). We use the value of -.5 to shift the midpoint down 50% from white to mid grey. 

Your displacement should now work correctly.

Tuesday, June 21, 2011

An Introduction to the Facing Ratio Property.

This is probably an old trick, but it can be a bit confusing how to hook it up, so I thought I'd pop a brief outline on here.

The Facing Ratio trick is a great way to simulate lots of things where a lighter colour is required around edges. It's good for making glass, velvet, car paint and fake subsurface scattering out of standard Maya shaders, and I'm sure there are other uses for it too.

I'm just going to give you the basics of how to hook this up.

You need a sampler info node from the Utilities rollout in your hypershade, and a ramp texture.

It's all really simple, middle mouse drag the sampler info node in your work area to the ramp texture node.

A menu will appear, asking how you want to connect the nodes, just click other. The connection editor will pop up, and you want to click facingRatio on the left and connect it to uCoord or vCoord (expand the uvCoord rollout) depending on how your ramp is set up (vCoord for a V Ramp, uCoord for a U Ramp, doesn't matter which way you do it).

This will now place the top colour of your ramp facing the camera, and the bottom colour just around the edges facing sideways from the camera.


From here you can plug it into anything you like, Incandescence and colour works well for velvet, but play around with it and see how you go. It can probably be used in conjunction with mia shaders for some cool effects too.

Don't forget you can map each selected colour in your ramp with other nodes!

Tuesday, June 14, 2011

sIBL: Fast, Free and Fabulous-looking Image Based Lighting

Today it's my birthday, and what better way to celebrate it than to give you all a present!

I found this neat little program/script/plugin for 3D applications called sIBL.

Image based lighting is a great way to integrate your 3D models into a real-world photo and create a realistic lighting environment for your CG work. Unfortunately, while it’s not hard to set up (in Maya at least), neither is it easy to get it looking great while still rendering very quickly.

sIBL is an external tool, independent of any 3D software which creates fast and splendid looking scripts for various 3D packages to encorporate image based lighting. Best of all, it’s absolutely free.

The team at HDR Labs also have a big library of free HDRIs tailored for use with sIBL that are easy to use and look fantastic.

I had a brief play with it for our paper puppet film, Keeping Station, and it worked perfectly. So at the risk of sounding like their marketing department is paying me, check it out!

Tuesday, April 5, 2011

Maya Shelves as Marking Menus

I've been sitting on this one for some time to be honest, since March last year! Why have I been holding out on you? Because it's one of those things that you only really set up once and then you forget about it.

I was on CG Society a while back and I asked if anyone knew of a way to store all your shelves as some sort of marking menu. Well, CGSociety's NaughtyNathan obliged me, and here's what came out of it:

Use the instructions below to create custom hotkeys, or this script to do it automatically:

{
// define the command strings
string $pressCmd = "if( `popupMenu -exists tempMM` ) deleteUI tempMM;popupMenu -sh 1 -mm 1 -b 1 -aob 0 -p viewPanes -pmc buildShelvesMM tempMM";
string $releaseCmd = "MarkingMenuPopDown;";
// create the runTimeCommands. this isn't absolutely necessary, but it gives the hotkey
// a real command attachment so it can be seen and edited in the hotkey Editor:
runTimeCommand -ann "Press hotkey for shelf MM" -category "User Marking Menus" -c $pressCmd "hkShelfMMpress";
runTimeCommand -ann "Release hotkey for shelf MM" -category "User Marking Menus" -c $releaseCmd "hkShelfMMrelease";
// create the nameCommands (this is what the hotkey attaches to):
nameCommand -ann "hkShelfMMpress" -c "hkShelfMMpress" "hkShelfMMpressNameCommand";
nameCommand -ann "hkShelfMMrelease" -c "hkShelfMMrelease" "hkShelfMMreleaseNameCommand";
// define the actual hotkeys:
hotkey -keyShortcut "X" -n "hkShelfMMpressNameCommand"; // SHIFT-X
hotkey -keyShortcut "X" -rn "hkShelfMMreleaseNameCommand"; // SHIFT-X
}


Hotkey Instructions:


Open Maya, and from the menu go to Window, Settings/Preferences, Hotkey Editor.

Down the bottom to the right, click New (next to the Name box) to create a new command, and call it "hkShelfMMpress". Change the category to User from the rollout, and in the command box, paste the following:

//----------------------- if( `popupMenu -exists tempMM` ) deleteUI tempMM; popupMenu -sh 1 -mm 1 -b 1 -aob 0 -p viewPanes -pmc "buildShelvesMM" tempMM; //-----------------------


Click Accept.

You will notice the Assign New Hotkey box on the upper right is no longer disabled. In the Key box, type shift + x (it will appear as X in the key window, as the shift is expressed as a capital of the key). Click Assign.

Click the New button again to create a second hotkey. Name this one "hkShelfMMrelease", make sure the category is still 'User' and paste the following code into the Command box:

//----------------------- MarkingMenuPopDown; //-----------------------


Click accept, and make sure the right command (hkShelfMMrelease) is selected in the Commands window. With this selected, type shift + x again into the key box in the Assign New Hotkey box on the right. Change the direction to "Release" and click Assign.

Save and close.

Now when you hold shift + x and left click and hold in a viewport, a menu will pop up. This menu is a list of all the commands in your shelves. Note that at first, only one or two shelves will appear in this menu. Only the shelves you have opened in the session will be available. To activate additional shelves in this menu, you must click the corresponding shelf tab normally at the top of the Maya window and it will become available. Commands added to the shelf will be immediately available in the hotkey menu.

Note: Not all hotkeys will work with this script, the one given in these instructions will. Please remember to restart Maya or rehash after placing the file in the appropriate directory.

Once you've got that setup, save the following code in a file called buildShelvesMM.mel and put it in your \My Docs\maya\scripts\ or wherever your default scripts folder is:


// uses the internal tempMM to display all your shelves
// and their contents on a hotkeyed Marking Menu
// Original Script - Naughty Nathan - 24/03/10
// Disabled shelves not loaded from marking menu - Leon Woud 25/03/10
global proc buildShelvesMM()
{
menu -e -dai tempMM;
global string $gShelfTopLevel;
if (!`tabLayout -ex $gShelfTopLevel`)
{
menuItem -en 0 -l "Global ShelfLayout does not exist!";
return;
}
string $shelves[] = `shelfTabLayout -q -ca $gShelfTopLevel`;
for ($shelf in $shelves)
{
string $buttons[] = `shelfLayout -q -ca $shelf`;
if (`size($buttons)`)
{
menuItem -sm 1 -l $shelf;
for ($button in $buttons)
{
string $label = `shelfButton -q -l $button`;
string $cmd = `shelfButton -q -c $button`;
menuItem -l $label -c $cmd;
}
setParent -m ..;
}
}
setParent -m ..;
}


And voila! Shelf marking menus.

Note: This script ONLY loads the shelves you've already accessed in your current session into the marking menus, this is just to keep stuff neat and tidy. If you'd like a version which loads all your shelves, check out the original thread here:
http://forums.cgsociety.org/showthread.php?f=7&t=865857


Original script by Naughty Nathan, CG Society - 24 March 2010
Shelves not loaded will not be displayed functionality by Leon Woud - 25 March 2010
Documentation by Oana Croitoru - 25 March 2010

Tuesday, February 8, 2011

Messiah Studio $10 challenge

http://projectmessiah.com/x6/shop.html

I stumbled on this the other day. pmG's messiahStudio is an Animation and rendering package that's really made for tough animation. It's been used in films, ads, games etc for awhile now, and costs around $500-$1200 USD. They're currently trying to get a lot of people to buy it, and so are offering it for $10 (standard) or $40 (pro).

Here's the challenge to the 3D industry:

We're doing an unprecedented viral test marketing campaign where your success in sharing this offer will allow you and others to get our amazing award winning animation and rendering software ( messiahStudio5 ) for the unheard of price of just $10 (regularly $499) or choose the Pro version for just $40 (regularly $1195). When this experiment ends, the prices will return to normal.


This is the same software that studios and individuals, in more than 60 countries of the world, have been using to create visual effects for some of your favorite movies, commercials, games and music videos; and now you can get it at a no excuses price, if you "Dare To Share™". People using our software have been nominated for Academy Awards, and changed their lives creating things they'd never thought possible on their own. CG Animated Features, Visual Effects, Consumer Product and Architectural Visualization, Simulation, Plugin Development, Smart Phone App Animation and Game Development Export; What will you do?


Everyone needs a chance to show what they can do. That chance is more often limited by money; maybe that's you, maybe that's someone you know; a parent, a friend, some students of yours. We got a chance to prove what we could do starting out, and now we're giving one to you. It's the best deal we've ever offered, and a chance you'll probably never have again. Order now to reserve your copy; we will accept no crying if you miss out : )


Rules: Everyone can only receive their license when the goal is met. That's your incentive to spread the word and share the offer.

This offer is open to: Individuals, small businesses, hobbyists, starving artists, the unemployed, schools, students, CG studios, game developers, plugin developers, architects, tinkerers, compositors and aspiring movie makers, in any country. Limit 4 copies per customer, mix and match.


We will update the progress bar so you can see where you're at in reaching that goal. When the bar reaches the end, we will close out the offer and no further orders will be allowed; no exceptions. In the event the goal is not met, we will simply refund everyone. Whether you get the software for this amazing price is up to you, and how well you get the word out.


If you need to purchase licenses of the software to use right now for a project, you can purchase them normally HERE -> Buy Normal, and if the goal is met from this offer, you will be refunded the difference in price between the equivalent version you purchased, and the Dare To Share™ special.


http://projectmessiah.com/x6/shop.html

Tuesday, November 23, 2010

Mental Ray Production Shaders for Maya

Yesterday, my tutor Ollie sat me down and went over a hidden tidbit in Maya called Mental Ray production shaders. Why are they hidden you ask? Because they're unsupported. This is a fancy way of saying that, while they mostly work, if you plug the wrong thing into the wrong thing, everything crashes. No errors, you won't get a slap on the wrist and told you can't do that, it will just die...so save often :D

But you can get results like this in about 7 seconds (2 secs a pass or so), with only 1 light, and no final gather or GI, and it doesn't flicker during animation:


So how do we get to these shaders to be visible in Maya? With this handy dandy line of MEL!

Simply go to your script editor, type in:
optionVar -intValue “MIP_SHD_EXPOSE” 1;
(If you're on a mac, I recommend you type this out manually, there's some issues with copying and pasting quotation marks, where Maya won't recognize them as quotation marks) and run it. Then reopen Maya and voila!

Voila what? There's nothing there!

...well there is. If you open up the Hypershade, all our shiny newly available production shaders are prefixed with mip, so if we do a search from that in our Mental Ray tab, we can find the production shaders.

There's about sixteen of them, and if you're interested in more detail than I go into here, Mental Images has released a white paper outlining the purpose of each of these shaders and how to use them. Because I'm a lovely person, I had a bit of a rummage for it, and you can download it by right clicking here and clicking save as.

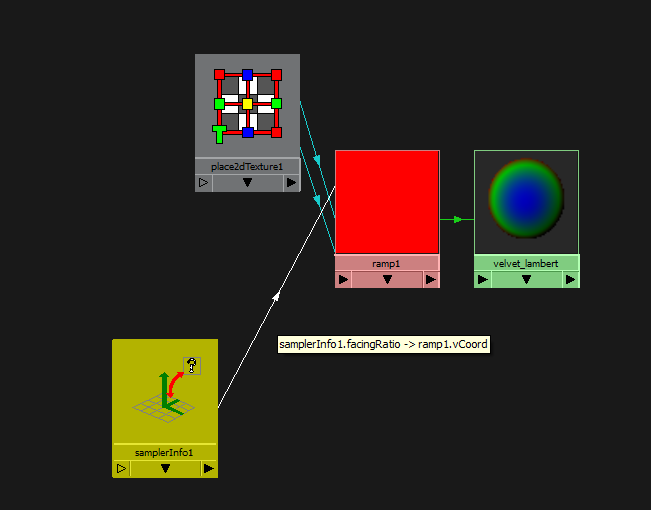
While pretty much everything in there is useful, I want to talk about the mip_grayball and mip_mirrorball shaders.

The mip_grayball shader is a concept very loosely related to spherical harmonics, a very complex way of calculating light emission in order to provide a type of ambient illumination. There's a very wordy explanation on it if you look at the Wikipeida article, but I will not be held responsible for any brain cramps or explosions due to an overload of math.

An important thing to note before we get into this is the mip_grayball shader works on the presumption that you have some sort of spherical light probe information, which means that the direction of the camera in your scene and the direction of your camera in the light probe photo should match. Rotating around a scene may get you strange (and possibly spooky?) results. For info on how to do light probe photography, check out HDRIshop's tutorial section.

But, for now here's how we can use the mip_grayball and mip_mirrorball shaders without having to subject ourselves to all these complex mathematical concepts.

We can use the mip_grayball shader to create an ambient light for our scene. This can be done either as a pass, or plugged into each of the geometry shaders. Considering the grayball shader needs to be plugged into everything that will have ambient light, it's probably easier to create a new render layer, and make a shader override which uses it.

But "Oh!"" you say, "What about pretty final gather and global illumination?" This method doesn't mean you have to toss your final gather and global illumination out the window. If you're lighting a cg scene, a good way of getting your sample data is to light your scene as you would using final gather and global illumination, and place an 18% gray matte sphere where you expect your point of focus to be. Center in your camera from the angle you plan to render from, and save out the image. Crop it, blur it a bit, and voila, you're ready to use mip_grayball for an ambient light.

For the example I'm using, I have geometry from our current production at Media Design School, and two probe samples from PixelCG:


Here's what we've got in the way of the scene. This scene uses a single directional light with raytraced shadows, tinted warm, to be the sunlight. There's currently a basic grey matte mia_material_x_passes on everything:


Now I create another render layer, taking all the geometry from my scene. I assign a layer override to a new mia_material_x, with no reflections, no refractions, and black in the colour slot, then create an mip_grayball shader. The shader itself its pretty simple, you will of course have your pretty final gather rendered ball for your scene, but I am using the above matte ball example. I create a new mental ray texture in the texture slot, and assign the gray ball image.

Then I plug the mip_grayball shader into the mia material's additional colour slot. When you render, it's lightning fast and you get something like this:


Not much to look at, but you can see you have all the bounce light coming from the correct direction, our blue tones from above, and earthy brown tones from below. After this, if we want, we can make a reflection pass with mip_mirrorball.

create a new render layer, with a fully reflective mia_material_x shader with no refractions and a black colour, and make it the shader override for the layer. Create an mip_mirrorball shader, and use a chrome ball image in the texture's image slot. Map the reflective mia shader we created, and plug the mirrrorball shader into the mental ray Environment shader slot within the shader group. When we render, we get something like this:


Excellent! Now, using our preferred method, we create an occlusion pass:


We end up with four passes (beauty, mip_grayball, mip_mirrorball and occlusion), and can now comp everything together.

I'm doing my compositing in Nuke, but this should be pretty easy to copy in other compositing packages. I use a merge node to add the grayball render onto the beauty. Note, you have to lower the mix quite a bit to get it looking nice, it's a case of tweaking it till it looks good. From there, I use a hue correct node to darken and saturate the creases in my geometry based on the occlusion shader (Prevents the dark blacks you get when using just the occlusion multiplied in). From there, add a little bit of the reflection in (mine's pretty even because it's an example, but only make reflection maps for things you're reflecting). Finally, a small grade to get everything looking a bit nicer. Here's the tree:


And the final image looks something like this:


This is a great way to get lighting for animation, as it shouldn't flicker or pop, and it's super fast!

Hope you guys enjoy it as much as I did :D

Tuesday, November 16, 2010

Welcome and RenderView Extensions for Maya 2011

Hello and welcome, here we have the brand new blog to be connected with my site. I intend to post updates of work, tidbits of things I find, and links to interesting and useful stuff.

As a kick off, I'd like to make a big shiny cardboard arrow and point it towards RenderView Extensions, a set of scripts you can download from CreativeCrash that make your Maya render view window better and easier to use.

I wanted a way to save all the snapshots I'd made in my render view at once (because I'm lazy and don't like wasting my time on repetitive tasks that I can automate), so I hunted around and stumbled across this which does all that and more (for only $0.00!).

The instructions in the folder are slightly confusing and buried halfway through the readme. Here are better ones:

1. The sz_renderView.mel file from the root directory, then the 3 mel files from the folder labled with the version of Maya you are using (renderWindowPanel.mel, mayaPreviewRender.mel, mentalrayPreviewRender.mel) go into the root of your scripts folder (whatever comes up when you run the mel command getenv "MAYA_SCRIPT_PATH";)

2. The appropriate icons for your version go straight into your icons folder(found by running the mel command getenv "XBMLANGPATH";).

3. Restart Maya

4. Profit